By contributing partner and guest blogger, Sandra Powell - Sawdust Girl
This cute wood book holder is super easy to build and would be a great DIY gift that you can
build in an afternoon. It can be used to hold an iPad or a traditional book and finished any way
you can imagine. Use wood scraps from around the shop and this becomes the most
inexpensive project possible —free!
We used undersized 1/2” plywood for the main body, 3/4” solid pine for the legs and 1 3/4”
SPAX #8 Multi-Material construction screws to put it all together.
The main body is comprised of three parts.
• Back - 10” tall x 15” wide
• Front - 4” tall x 15” wide
• Spacer - 1 1/4” tall x 15” wide
We’re using a water-based finish, so we sprayed the surface with water to raise the grain, then
sanded with 220 grit sandpaper to cut off the raised fibers.
It will be easier to apply your finish before you assemble so choose your preferred finish and go
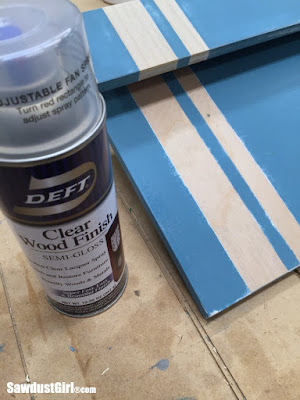
crazy! We’re applying paint but taping off a couple stripes that will expose the bare wood once
the tape is removed. We applied a coat of primer and then a coat of paint.
Once the paint dried, we assembled the pieces together, sandwiching the spacer between the
front and back. We secured the pieces with clamps and drove 4 or 5 screws along the bottom
edge. When you countersink the 1 3/4” screws, they run through the back and spacer and into
enough of the front to hold it.
At this point you can fill the screw holes with wood putty and sand the back smooth again. Then
it’s time to attach the legs. The legs are made from a piece of 6x6 pine cut in half at a 45º angle
on the miter saw. We spaced the legs about 3” from the sides of the back of the book holder
and secured them with a clamp.
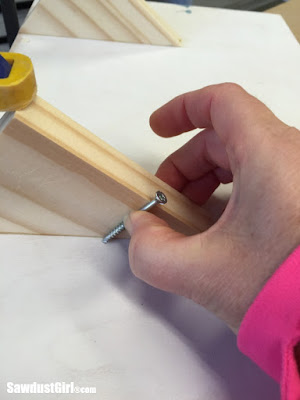
We eyeballed the position of the screws for attaching the legs without poking through the front
of the “back”. Then drove one screw into the bottom and top of each leg.
SPAX screws are so easy to work with because you can skip the step of drilling a pilot hole and
countersink without risking splitting the wood.
Now you can paint the back. We didn’t spend a whole lot of time finishing the back since it IS
the back but decided at least one coat of paint was needed. We went ahead and painted the
bottom, sides and added another coat of paint to the front as well.
Remove the tape to reveal the bare wood and finish the piece.
We lightly distressed the edges and stripes by sanding with a very used piece of 220 grit
sandpaper. Wiped that down and sprayed the entire thing with a coat of Deft clear coat.
Let dry and enjoy!

SPAX.us
To find a SPAX retailer near you click on our Store Locator.
SPAX - Do it Once. Do it Right®

Follow Sawdust Girl on: Facebook, Twitter and YouTube


No comments:
Post a Comment